Growing Beets: A Versatile and Valued Winter Vegetable
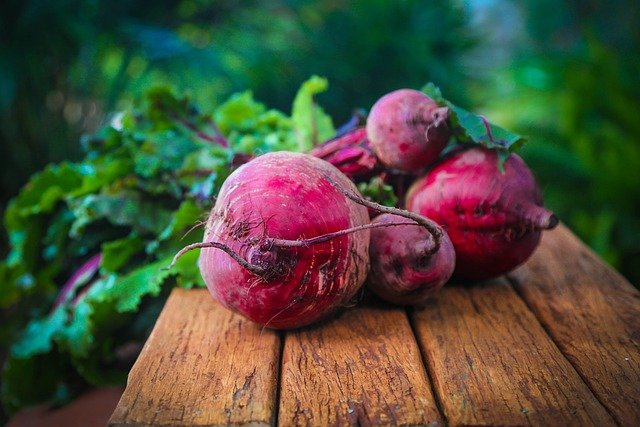
Beetroot is highly valued as a winter vegetable. Many people enjoy it in salads, cooked dishes, or as raw vegetable juice. But did you know that beets are also a great natural option for hair coloring in makeup? Even if you have limited space at home, you can easily grow this nutritious vegetable in tubs or containers during the winter months.
Preparing the Soil
To start, it’s important to prepare the soil properly. Mix together some coco peat, garden soil, a handful of neem shell, and organic manure. You can use either cow dung manure or mustard husk compost for the organic component. Once you’ve prepared the soil mix, let it sit for at least 10 to 15 days. Place the mix in a 10-inch tub, ensuring the soil is watered during this period.
Planting and Care
Once the soil is ready, purchase beet seedlings from a nursery and plant one seedling per tub. For the first seven days, keep the seedlings in a shaded area, watering them regularly twice a day. Once the plants start to grow bigger, you can gradually expose them to sunlight. Water the plants thoroughly every 10 days to keep the soil moist but not waterlogged.
Harvesting
After about two months, when the plants have grown significantly, the beets will be ready for harvest. Not only can you enjoy the nutritious root, but you can also use the beet leaves in winter vegetable dishes or salads.
Growing Beets in the Garden
If you have space in your front yard, beets can also be grown directly in the ground. Be sure to plant the seedlings at a distance from each other to give them room to grow. Follow the same care instructions for a successful harvest.
Here’s your revised article with improved grammar and structure:
Lettuce Cultivation Method
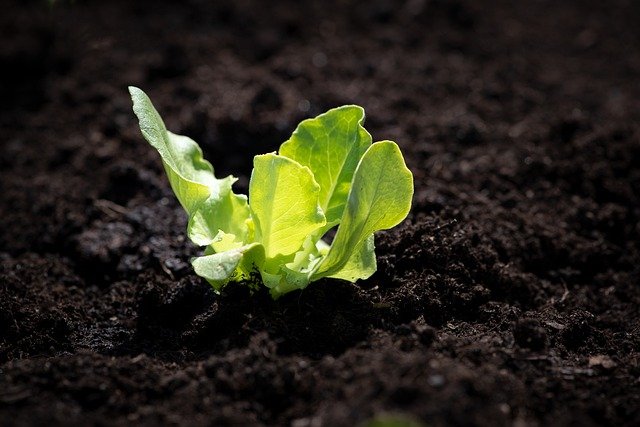
Growing lettuce on a rooftop is quite simple. To get started, you’ll need to collect seeds from a reputable source. Once you have the seeds, remove them from the packet and dry them in the sun for an hour. After sun-drying, place the seeds in a shaded area for an additional hour to cool. Once the seeds have cooled completely, soak them in a bowl of water for 10–12 hours.
After soaking the seeds, prepare a pot or tub filled with coco peat, and sprinkle the seeds on top. Alternatively, you can plant the seeds in seed trays if preferred. Seedlings will typically emerge within 3–5 days of sowing. Once the seedlings are 10–12 days old, carefully transfer them from the seedbed or seed tray into a tub. When doing this, try to disturb the roots of the lettuce as little as possible to avoid damaging them.
For your growing medium, you can use a mixture of 50% coco peat and 50% compost instead of soil. This combination makes the tub lighter and allows for better air circulation than soil alone, which may lead to faster growth of the lettuce.
Once you’ve planted the seedlings in the soil or coco peat medium, there’s minimal work left. Water them lightly every day, and avoid exposing them to direct sunlight initially, as this can cause sunburn on the delicate seedlings. Once the seedlings are established, they can tolerate sunlight without any issues. Lettuce becomes ready to harvest and consume within 35–40 days after planting.
Here’s your revised article with improved grammar and structure:
How to Plant a Basil Plant in Tubs
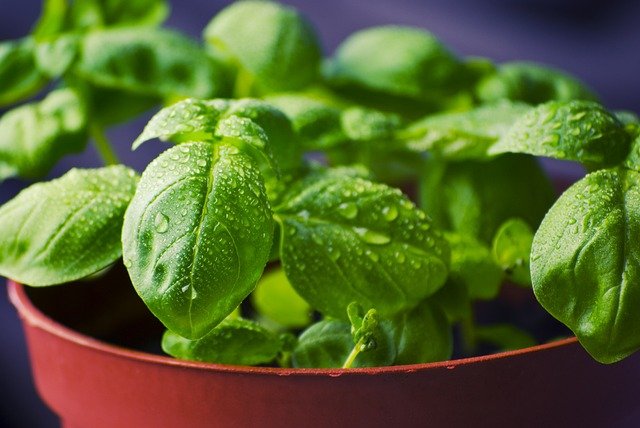
Basil, also known as Tulsi, is an evergreen herb with remarkable medicinal properties. It holds significant cultural and spiritual value in Bangladesh and India, where it’s a common household plant. Basil is known for its resilience, thriving in a variety of soils and enduring harsh environments, which makes it relatively easy to care for. However, those of us planting it in tubs should focus on providing the right soil for optimal growth.
Tub and Seedling Collection
For planting basil in tubs, start by selecting an 8- or 10-inch container. Ensure that the tub has good drainage to prevent waterlogging. Next, choose a healthy basil seedling or sapling from a reliable source.
Soil Preparation
Although basil can grow in various types of soil, it prefers slightly saline soils for better development. White river sand is excellent for growing basil. To prepare the ideal potting mix, combine:
- 1 part river white sand
- 1 part garden soil
- 1 part organic manure (such as compost or cow dung)
Mix these components thoroughly to create a well-drained, nutrient-rich medium. Place the basil plant in the center of the tub and gently fill in the prepared soil mixture. Water the plant generously after planting.
Care Instructions
- Sunlight: Basil thrives with at least 4 hours of sunlight each day. You can place the tub in full sun or partial shade, depending on your location.
- Watering: Avoid overwatering. Water the plant only when the soil appears dry to touch. Too much moisture can lead to root rot.
- Fertilization: Every month, mix 1 handful of powdered mustard seeds and half a teaspoon of TSP (Triple Super Phosphate) or DAP (Diammonium Phosphate) into the soil. This will supply essential nutrients for healthy growth.
Common Pests and Diseases
Basil is generally pest-resistant but can sometimes attract insects. If you notice any pests, prepare a natural pesticide by mixing:
- 1 tablespoon neem oil
- A small amount of detergent soap (just a pinch)
- 1 liter of water
Spray this mixture on the plant to keep insects away. Additionally, spraying plain water on the plant every two days can help prevent pest infestations.
Tips for a Bushier Plant
To encourage a bushier basil plant, prune the top of the plant when flower buds start to appear. This will promote more branching and fuller growth.
By following these simple steps, you can enjoy a healthy and thriving basil plant in your tub, providing fresh leaves for culinary, medicinal, or religious purposes year-round.
Advanced Method of Cabbage Cultivation
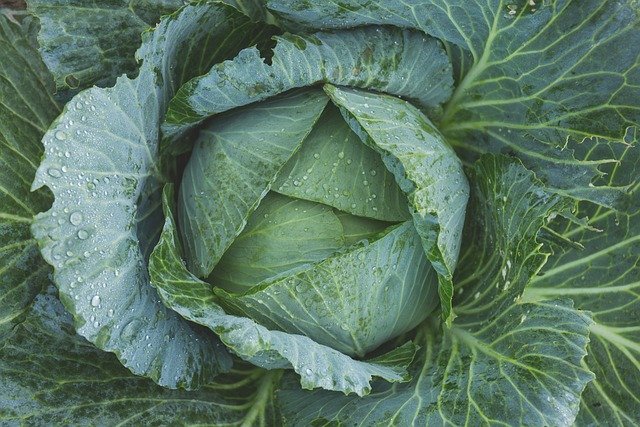
Cabbage can be cultivated in almost all types of soil except excessively sandy soil. However, cultivation in highly acidic or red soil doesn’t yield very good results.
On the other hand, loamy or silty loam soil is considered the most ideal for cabbage cultivation.
Sowing Time
Although cabbage is traditionally a winter vegetable, it can now be cultivated in summer and monsoon as well. Additionally, during the winter season, cabbage can be grown both as an early and late crop.
Cabbage varieties suitable for cultivation can be categorized into three groups:
- For early varieties: Sow from July-August to September-October.
- For mid-season varieties: Sow from October-November to November-December.
- For late varieties: Sow from December-mid-January to January-mid-February.
The optimal sowing times for cabbage depending on the season are listed below.
Land Preparation Method
The primary task in cabbage cultivation is land preparation. The soil needs to be plowed 4-5 times to make it loose and friable.
Additionally…
- During the final plowing, apply the necessary fertilizers evenly and mix them with the soil.
- Once the land is prepared, make raised beds 15-20 cm high and 1 meter wide.
- Keep a distance of at least 30 cm between the beds and create furrows between them.
Seedling Production and Planting Method
The best method for cabbage cultivation is to first produce seedlings in a nursery bed and then transplant them into the field. Depending on the variety, you will need 2-3 grams of cabbage seeds per decimal (40 m²), and 500-700 grams per hectare.
For nursery bed preparation…
- Mix sand, soil, and organic manure well to make the soil friable for the seedbed.
- The seedbed should be 1 meter wide and 3 meters long.
- When the seedlings are 1 to 1.5 months old (5-6 leaves, 10-15 cm tall), healthy and strong seedlings should be transplanted into the field.
Additionally…
- Maintain a spacing of 60 cm between rows and 45 cm between seedlings.
- About 150 seedlings are required per decimal.
- Transplant the seedlings in the late afternoon.
- For rooftop gardening, 20 to 22 seedlings are needed for a 5-meter-long bed.
- Plant the seedlings in two rows on the bed.
- Since fewer seedlings are needed for rooftop gardening, it is best to buy seedlings from a nursery.
Fertilizer Application Method
To achieve good cabbage yields, using organic manure in the soil is essential. Organic manure helps maintain soil quality and benefits the environment as well.
To obtain good yields, it’s better to use organic fertilizers rather than chemical fertilizers.
Application Method:
- Apply 125 kg of cow dung, 1 kg of urea, 800 grams of TSP, and 650 grams of MOP per decimal.
- Apply all the cow dung and TSP during land preparation.
- Apply urea and MOP in two installments, one 20-25 days after transplanting and the other 30-40 days later.
- Water lightly after each fertilizer application.
Care and Irrigation
The cabbage field should be monitored regularly. After applying fertilizer to the rows, soil should be pulled from both sides to the base of the plants, facilitating irrigation and drainage.
If there is a water shortage in the field, make arrangements for quick irrigation to ensure a good yield.
However…
- After applying fertilizer and irrigation, weed control should be done as soon as the soil dries.
- Ensure that water doesn’t accumulate in the field for too long.
- After heavy rain, make sure to remove excess water from the field.
- Weed control should be done 20-25 days after transplanting.
- If cabbage plants are too dense, thinning is necessary.
- Weed the field 2 to 3 times between transplanting and head formation.
Pest Control and Disease Management
Various pests and diseases attack cabbage fields. The most harmful pest is the cabbage head borer.
Other pests such as cutworms and caterpillars also cause occasional damage.
The major diseases affecting cabbage are leaf spot and black rot. Sometimes, damping-off, grey mold, clubroot, mosaic, and tip burn also occur.
Cabbage Disease and Pest Control Measures:
Farmers often suffer losses in cabbage cultivation due to a lack of knowledge about pest and disease prevention. Consequently, they do not achieve the expected yield.
To obtain a good yield, it’s important to know how to prevent pests and diseases in cabbage cultivation from the outset.
Black Rot Disease
- Soak the seeds in hot water at 50°C for 30 minutes to disinfect them before sowing.
- Keep the field weed-free and use approved fungicides if necessary.
Damping-Off Disease
- Apply 100 to 125 kg of mustard cake per acre for disease control.
- Remove and destroy affected seedlings as soon as they are detected.
- Ensure adequate organic manure and moderate urea use.
- Maintain proper drainage to prevent excessive soil moisture.
Leaf Spot Disease
- To control this disease, maintain balanced fertilization and irrigation in the field and plant seedlings at the correct spacing.
- At the early stage of the disease, spray Score 250 EC at a rate of 5 ml per liter of water every two weeks.
In addition, several pests also attack cabbage fields, so it’s essential to know how to protect the crop from them.
Cabbage Borer
- If possible, collect and destroy larvae and eggs by hand.
- Mix Voliam Flexi 300 SC at a rate of 5 ml per liter of water and spray thoroughly on the plants.
Cabbage Aphids
- After harvesting, burn the remaining crop debris and plow the land thoroughly.
- Hand-pick and crush larvae and eggs.
- Mix Proclaim 5 SG at a rate of 1 gram per liter of water and spray the plants thoroughly. If necessary, repeat the spray every 5 to 7 days.
Easy Cabbage Cultivation in Pots
Cabbage is not commonly available outside of winter. However, with organic methods, it can be grown year-round on rooftops.
Follow these steps for rooftop cabbage cultivation:
- Choose a spot on your balcony or rooftop that has good air circulation and sunlight.
- Use soil or plastic pots for cabbage cultivation, or you can use polybags, tin containers, or plastic vessels.
- Cabbage grows well in earthen pots.
- You can buy seedlings from the market or sow seeds yourself.
- Proper soil preparation is essential for cabbage cultivation.
- Mix regular soil and white sand (60%) with vermicompost or cow dung manure.
- Apply fertilizer when preparing the soil, as later applications can be difficult when the cabbage plants grow large.
- Fill the pot with soil, create a small hole, and plant the seedling or seed, then water it.
- Place the cabbage plant in full sunlight from the beginning, and water regularly.
- To keep pests away, apply neem oil every 15 days.
- If the cabbage plant grows slowly, you can apply mustard cake soaked in water after 7 days.
- Cabbage takes 60 to 90 days to mature. Once harvested, you’ll notice that homegrown organic cabbage tastes much better than the store-bought variety.
Success in Agriculture: Colorful;’
Cabbage Cultivation
The variety “Lalima” is a colorful cabbage that is visually appealing, mildly sweet in taste, and nutritious. It doesn’t require much extra care and has a high yield and market value.
Due to its good yield and price, farmers are increasingly interested in growing colorful cabbage. It has become a profitable crop for many farmers.
Reasons for Farmers’ Interest in Growing Colorful Cabbage:
- It looks very attractive.
- Suitable for consumption as a salad.
- Cabbage matures within 80-90 days, making it marketable quickly.
- High yield and profit margins.
- People are eager to buy this red variety, making it in high demand.
- Farmers are earning good profits with minimal investment.
In the past, colorful cabbage was not widely cultivated in the country, but now more and more farmers are turning to it. Shortly after transplanting, rows of colorful cabbage plants spread across the field. Once the outer leaves are removed, bright red cabbages emerge.
How to Grow Garlic in Tubs on the Roof
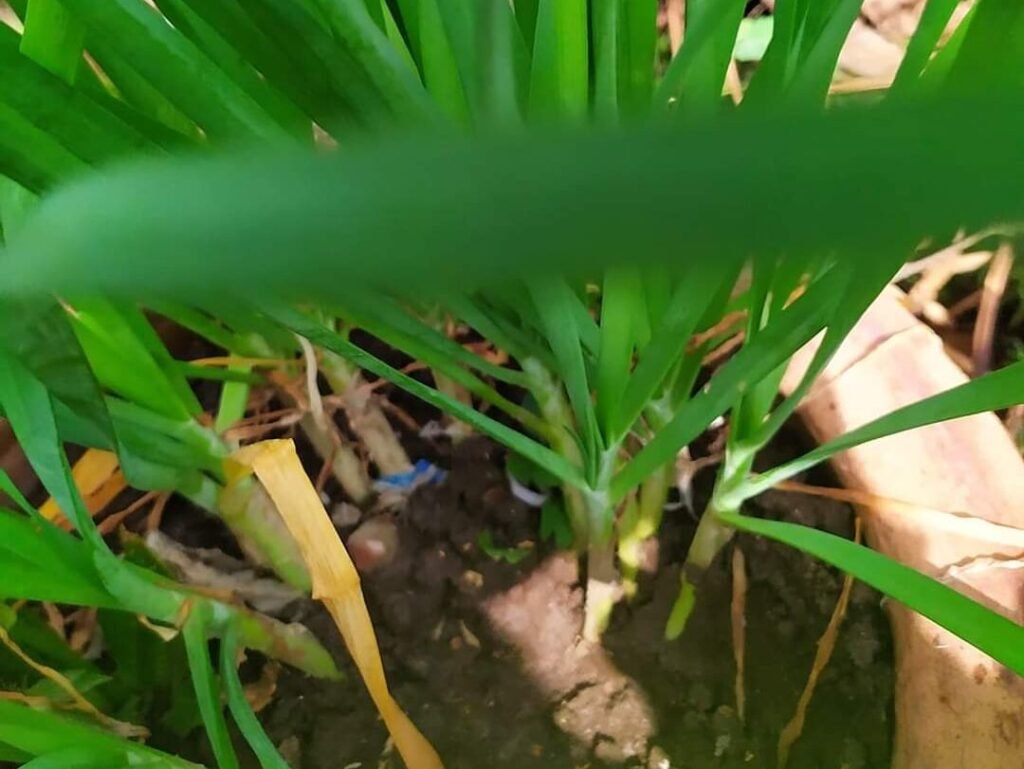
Growing garlic at home is simple and rewarding, and you can easily do it on your rooftop using tubs. Here’s a step-by-step guide to help you grow garlic successfully in containers.
Best Time for Cultivation
The ideal time for planting garlic is from mid-October to the first week of November. However, you can also grow garlic at other times of the year, although the timing affects the size and yield.
Preparation of Tub and Soil
- Choose a medium-sized tub that can accommodate about 15-20 garlic plants.
- Garlic thrives best in loamy soil, which is rich in organic matter.
- A warm and humid climate is ideal for garlic cultivation, so ensure your rooftop gets adequate warmth and sunlight.
Seed Preparation
- Garlic plants are grown from the cloves of garlic bulbs.
- To plant, make a hole in the soil and insert half of a garlic clove into the tub. Make sure the pointed end is facing upwards and the flat root-end is downward.
Irrigation
- Water the garlic plants occasionally. Overwatering can lead to rotting, so it’s important to monitor the soil moisture.
- Ensure that the tub has drainage holes at the bottom to allow excess water to escape.
Care
- Place the tub in a location where it receives plenty of sunlight and fresh air. Garlic needs at least 6 hours of sunlight daily.
- Remove any weeds that might grow in the tub. Be gentle while doing this so you don’t damage the garlic plants.
- For additional nutrition, apply organic manure or compost to the soil.
Harvesting the Garlic
- Seedlings will start to appear about a week after planting.
- Once the leaves turn brown, it’s time to harvest your garlic.
- After harvesting, allow the garlic to dry in the shade for 2-3 days before storing or using it.
Following this method will give you fresh, homegrown garlic that you can use in your kitchen or store for future use. Enjoy the process of rooftop gardening!
Modern Methods for Growing Beans: A Comprehensive Guide
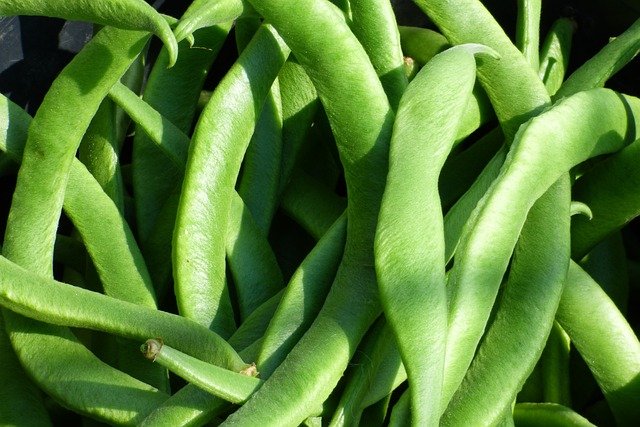
Growing beans using scientific and modern methods can yield excellent results. Beans are a great vegetable to cultivate because they are less prone to viral infections compared to other vegetables and generally require less fertilizer.
Many farmers are turning to the commercial cultivation of summer or early beans due to the profitability of this crop. However, not everyone is achieving the desired success due to a lack of knowledge about the right techniques. Let’s explore the best practices for successful bean cultivation.
Best Time for Cultivation
- Early cultivation: Sow beans from Jaistha to Ashad (summer season).
- Winter cultivation: Sow beans from Shravan to Bhadra (monsoon season).
- General rule: Beans grow well in all types of soil, but well-drained loamy and sandy loamy soils provide the best results. Beans perform better in cool and dry climates.
Land Selection and Bed Preparation
- The land should be well plowed and hoed several times to ensure it’s suitable for bean cultivation.
- Prepare raised beds, keeping the length, width, and depth of each bed at 45 cm.
- Maintain a distance of 3 meters between beds for proper spacing and air circulation.
Tips:
- Choose high land to prevent waterlogging, as beans are sensitive to excess water.
- Ensure the land gets sufficient light and air.
Fertilizer Application
For commercial cultivation, applying the right fertilizers is key to high yields. The following mix is recommended per bed:
- Cow dung: 10 kg
- Khail (oil cake): 200 gm
- Ash: 2 kg
- TSP: 100 gm
- MOP (Muriate of Potash): 50 gm
Apply this mixture while preparing the beds. Additionally:
- Urea and MOP (50 gm each) should be applied in two installments, 14-21 days after sowing.
- Fertilizers like Urea, Potash, DAP, Zinc, and Boron should be added as required, depending on the plant’s condition.
- Hormones like Flora or Lithocone can be used to enhance growth.
Sowing and Training the Plants
- Sow 4-5 seeds per bed.
- Soak the seeds in water for 10-12 hours before planting to promote faster germination.
- Once the seeds have germinated, thin out the seedlings, keeping only 2-3 healthy plants per bed.
- If sowing in lines, maintain a spacing of 15 cm between seeds and 30 cm between rows.
Support:
- Beans are climbing plants, so you’ll need to set up a trellis or support system when the plants are 15-20 cm tall to allow them to grow upward. The more vines the plant produces, the higher the yield.
Maintenance and Irrigation
- Avoid waterlogging around the plants by ensuring proper drainage. Regularly loosen the soil and remove weeds around the plants.
- During the dry season, irrigate the plants as needed, but do not let water accumulate at the base.
- When the plants are 15-20 cm tall, insert bamboo sticks near the plant for additional support.
Variety Selection: Summer and Winter Beans
There are over 50 local varieties of beans in Bangladesh. Some notable ones include Baintara, Hatikan, Chaptashim, Dhala Shim, Putishim, and more.
For modern high-yielding varieties, consider the following:
- Bari Shim 1, Bari Shim 2, BU Shim 3, Ipsa Shim 1 & 2, Extra Early Irate.
- Auto Beans are great for summer cultivation. They yield consistently from Shravana to Chaitra if planted in Baisakh-Jaistha.
Winter Varieties:
- Bari Shim 1: Ideal for medium-early cultivation (sow in Ashad to Bhadra).
- Bari Shim 6, Naldog, Hatikan, Golgadda.
Pests and Diseases
Beans are susceptible to diseases such as mosaic and anthracnose and pests like leaf tunneling insects during the seedling stage. Other potential pests include:
- Red spiders – can cause damage during dry weather.
- Thrips – damage flowers.
- Bean beetles – attack ripened fruit.
Control Measures
- Use IPM (Integrated Pest Management) methods for pest control.
- For bean beetles and whiteflies, spray insecticides from the imidachloroprid group.
- For fruit borers, use insecticides from the emamectin benzoide or cypermethrin groups.
- Winter beans usually require fewer pesticides, reducing cultivation costs.
Growing Beans on the Roof
While beans typically need more space, they can also be grown on a roof garden using vertical structures to train the vines. Follow the same principles of spacing, support, and irrigation to ensure healthy growth.
By following these scientific and modern methods, farmers and home gardeners can achieve a high yield in bean cultivation, whether grown commercially or in a rooftop garden.
How to Grow Cherry Tomatoes in Tubs
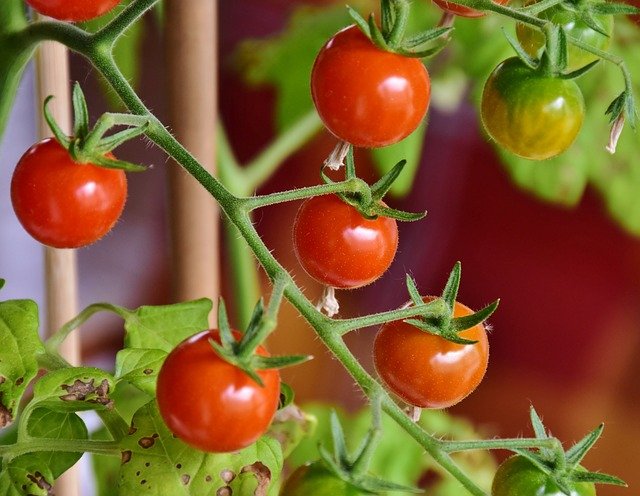
Growing cherry tomatoes is quite similar to growing other varieties of tomatoes, but it offers the advantage of being more compact, making it ideal for rooftop or balcony gardening. Here’s a guide to help you cultivate cherry tomatoes in tubs.
Suitable Soil and Climate
- Soil: Cherry tomatoes grow in all types of soil, but loam and sandy loam soils are most suitable.
- Temperature: Ideal for growth is 20-25°C, which makes winter (November to December) the best time for planting cherry tomato seeds in Bangladesh.
Step-by-Step Cultivation Process
- Seedling and Soil Preparation:
- Collect healthy cherry tomato seedlings or seeds.
- Prepare the tub soil by mixing:
- 50% cocopeat
- 30% clay
- 20% vermicompost
- Planting:
- Plant the seeds with equal spacing in the prepared tub soil.
- Cover the seeds lightly with soil and water thoroughly.
- Germination: Seeds will sprout within 15-20 days. Once they are 20 days old, transfer them to a bigger tub for further growth.
- Growth and Fruiting:
- Cherry tomato seedlings will start bearing fruit within two months of planting.
Fertilizer Application
- Mix 1 gram of NP (Nitrogen-Phosphorus) fertilizer in 1 liter of water and spray it on the plant leaves.
- Epsom salt and crushed eggshells can be added to boost the plant’s nutrition.
- Apply Flora (a type of plant hormone) when the plant is 15 days old, and again after it re-blooms to stimulate healthy growth.
Care for Cherry Tomatoes
- Sunlight: Place the tubs where the plant gets 2-3 hours of sunlight in the morning but is protected from the harsh afternoon sun.
- Shade: Be mindful to provide adequate shade.
- Watering: Water regularly but avoid overwatering.
- Support: As the plant grows, tie it to a strong pole to help it stand upright and bear more fruit.
- Protection: Protect the plants from excessive sun, shade, or rain as these conditions can affect the plant’s health.
Harvesting
With the right care and attention, cherry tomatoes are not only easy to grow but can also be a profitable crop for home gardeners.
How to Grow Carrots in Tubs
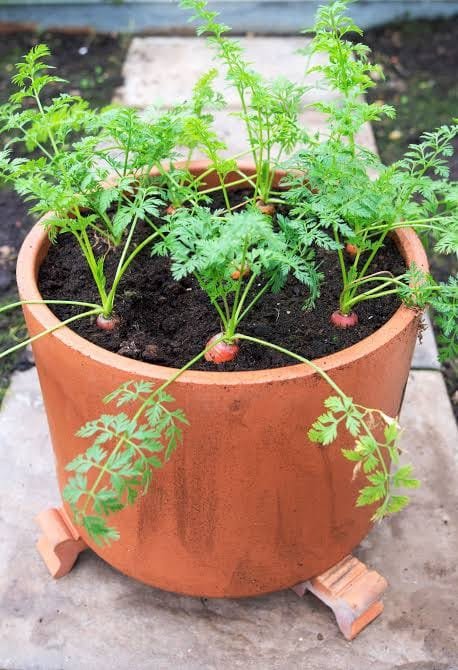
Growing carrots in tubs is a great way to cultivate fresh vegetables at home, especially if you don’t have access to a large garden. Here’s a step-by-step guide on how to grow carrots in tubs.
Choosing the Right Tub:
- Size: A large tub is ideal for growing carrots, as they need space to grow deep. The tub should be at least 12 inches deep to accommodate the long roots.
- Drainage: Ensure proper drainage by making holes at the bottom of the tub. This will help prevent waterlogging, which can rot the roots.
Soil Preparation:
- Type of Soil: Carrots can grow in various types of soil, but sandy loam is best suited for them as it allows the roots to grow freely.
- Soil Mix: You can also use a mix of cocopeat and organic fertilizers, which is widely available and ideal for carrot growth. A good mix would be:
- 1 part soil
- 1 part organic manure (like compost or vermicompost)
- 1 part cocopeat
- Clean the Soil: The soil should be well cleaned and moist before planting, as moist soil promotes proper root growth.
Sowing Time:
- Carrot seeds can be sown from August to December. The seeds typically germinate within 7-10 days.
Seed Sowing Method:
- Prepare the Soil: Once the tub is filled with the soil mix, spread the carrot seeds evenly on the surface.
- Mix with Ash or Soil Powder: Since carrot seeds are small, it’s best to mix them with ash or fine soil to ensure even distribution.
- Soak the Seeds: Soak the seeds in water for a few hours before sowing. If you soak them in the morning, you can plant them in the afternoon.
- Cover Lightly: After sowing, cover the seeds lightly with a thin layer of soil.
Fertilizer Application:
- Organic Fertilizers: The more organic fertilizers you can apply, the better. Use dung manure, compost, vermicompost, or even vegetable peels to enrich the soil.
- Inorganic Fertilizers: A small amount of TSP (Triple Super Phosphate) and MOP (Muriate of Potash) can be used to boost plant growth. A little urea can be applied if necessary, but be careful not to overdo it as nitrogen excess can harm the plant.
- Tea Leaves: Dried tea leaves can be used once every two weeks, which will provide beneficial nutrients for the plant.
Care for Carrots:
- Watering: Carrots need regular watering, but be careful not to overwater them, as it can cause root rot.
- Sunlight: Place the tub in a location where it can get several hours of sunlight daily.
- Thinning: Once the seedlings have sprouted, thin them out by removing weaker plants to allow the healthy ones more space.
- Weed Removal: Remove any weeds that appear, as they compete with the carrot plants for nutrients.
Disease Control:
- Jab Insects: Jab insects can damage the carrot plants by sucking sap from the leaves. You can control them by using insecticides such as imidacloprid or cypermethrin in moderate doses.
- Yellow Virus: This disease is spread by leafhoppers, which turn the young leaves yellow and curl them. To control this, cut off the affected leaves and use insecticides if necessary.
- Black Root Rot: Excess use of nitrogen fertilizers can cause black root rot in carrots. Ensure you use the right amount of fertilizers to avoid this.
Harvesting Carrots:
- Carrots can be harvested within three months of planting the seeds. However, for mature carrots, wait another 15 to 20 days. Do not leave the carrots in the soil for too long, as this can affect their quality.
By following these steps, you can enjoy fresh, home-grown carrots from your rooftop or balcony.

